Build and Release

A continuous learner for experience and life.

一个神奇的配置文件结构

Terraform external data source

引子

大约两年之前,当我还在Groupon工作的时候,实现过一个用JSON作为配置文件的build flow。基本概念借鉴 Bitrise和Fastlane,但力求每一个步骤(Step)使用JSON作为输入和输出,中间有一个处理过程。当时为了如何传递出返回的JSON信息,又不想污染环境变量,再加上出错信息处理,是否需要把出错结果也放在JSON里面,费过一段时间脑子。仍然没能设计出一个比较满意的结果。考虑到实现期限,当时的项目后来搁浅了。

因为离开了Groupon,那个项目没有善终。但是,如何设计一个比较满意的build step的配置文件,能够把编译步骤定义在其中,用JSON输入,JSON输出,如果出错能够妥善处理,log信息以编译模块为单元导入后台log服务,以便比较快速定位、查找出错信息,一直是我在持续编译/集成(Continuous Integration)上考虑的方向。

使用JSON格式,还有一个棘手的问题是怎么支持没有完全模块化的功能,比如,临时编写、调用一段bash脚本处理一个功能。JSON是一个非常简单的数据格式,不能支持变量替换,不能支持定义function(函数),把function写成string放在大段block中又失去了格式化显示、review纠错的优势。

几个月以前,首次接触了Jsonnet,对于JSON欠缺的功能,Jsonnet可谓对症下药,厉害之极(另一文详述)。然而如何在配置文件中实现函数,或者调用函数,关键是如何为之后的步骤传递返回值,没有帮助。这个不是Jsonnet的问题,因为Jsonnet本质上是一个JSON数据文件的扩展,它输出的是一个JSON数据文件,不能要求它考虑更多逻辑上面的实现。

Terraform的外部数据源配置结构

直到今天接触到terraform的external data source配置结构的设计,简直如得良玉,如获珍宝。它可以实现我想要的一切功能。首先上结构,然后详细解释:

1
2
3
4
5
6
7
8
9
data "external" "example" {
  program = ["python", "${path.module}/example-data-source.py"]

  query = {
    # arbitrary map from strings to strings, passed
    # to the external program as the data query.
    id = "abc123"
  }
}

https://www.terraform.io/docs/providers/external/data_source.html

HCL配置结构解释

这是一个HCL结构的配置文件。HCL(链接#2)是HashiCorp的配置文件,借鉴了UCL(链接#1)。虽然表现格式各有不同(包括Toml,Yaml),本质上都是JSON。底层的语言实现都会把这些数据存放为类JSON的结构。比如Python里面的Dict,Javascript的Assiciate Array,Java里面的Map,C++的Vector,等等。

这段配置文件定义了一个结构,如果用JSON表现,应该是这样的:

1
2
3
4
5
6
7
8
9
10
11
12
13
14
15
{
    “data”: {
        “external”: {
            “example”: {
                “program”: [
                    “python”,
                    “${path.module}/example-data-source.py”
                ],
                “query”: {
                    “id”: “abc123”
                }
            }
        }
    }
}

HCL结构非常灵活,第一行的data "external" "example",实际上可以定义任意多个字段,表现为JSON可以是任意级的block。这也正是HCL结构巧妙之处,它可以非常清楚的定义出在哪个层次执行;换句话说,执行体层次定义清楚。如果用JSON直接表现,很难看出来执行体会在哪一层运行。因为JSON对每一层级都同等对待,所以对于人眼而言,表现力不够清楚和明显。

第二行的program是一个程序的调用,很容易能够理解为,使用python为解释器运行在目录 ${path.module}/下的脚本example-data-source.py。

第三行query是一段提供给以上程序的输入参数,完全的JSON结构。Terraform严格要求数据值为string(字符串),意味着integer(整型数字)也需要用引号包括。

上面的这个结构,实现了一个函数调用,大意如此:

1
$ python ${path.module}/example-data-source.py ${query}

神奇的HCL配置结构

那究竟奇妙的地方在哪里呢?

  1. 它定义了输入参数/输出返回值的格式,这些返回值如何被后面的过程使用。比如,上传文件的过程完成以后,后面的过程需要知道上传文件成功返回的URL(链接),或者上传失败返回的错误信息。

  2. 它可以非常灵活的调用任何脚本,Python,Bash,Ruby,NodeJS等等;

  3. 它也可以是Serverless的调用端(如果满足JSON输入和JSON输出);

  4. 它可以实现没有完全模块化的功能;例如一个编译过程的临时fix(修正),之后可以用模块替代(使用Terraform模块扩展);

例子

用一个例子来说明:

安装Terraform

Terraform是一个客户端软件,安装非常方便,下载一个客户端命令行程序,放在一个PATH路径下,shell可以找到就可以了。这个是安装指导:https://learn.hashicorp.com/terraform/getting-started/install.html%E3%80%82

简单步骤: 1. 从这里:https://www.terraform.io/downloads.html 下载对应的压缩包; 2. 解压生成terraform; 3. 后移到:/usr/local/bin目录下。

Terraform 配置文件

然后找到一个工作目录,创建一个terraform 配置文件,用到我们以上讨论到的结构,命名为example.tf,内容如下:

1
2
3
4
5
6
7
8
9
10
11
12
13
14
data "external" "example" {
  program = ["python", "./example.py"]

  query = {
    # arbitrary map from strings to strings, passed
    # to the external program as the data query.
    id = "abc123"
  }
}

# 使用以上过程产生的结果,打印验证
output "result" {
  value = "${data.external.example.result}"
}

脚本文件

在同样的目录下,创建对应的脚本文件example.py:

1
2
3
4
5
6
7
8
9
10
11
12
13
14
15
16
17
18
19
20
21
import json
import sys


def main(opts=None):
    '''The main routine'''

    retval = {}
    # 直接使用输入参数,这里可以改变为其他逻辑
    retval.update(opts)
    # 为了能看出改变,添加了一个key/value到输出
    retval.update({"abc": "123abc"})
    return retval

if __name__ == "__main__":
    # 获得输入参数
    args = json.load(sys.stdin)
    # 运行主函数
    retval = main(args)
    # 打印JSON格式输出
    print(json.dumps(retval))

初始化配置环境

然后在同样目录下,初始化这个terrform例子的配置环境:

1
$ terraform init

可以看到external plugin安装了:

1
2
3
4
5
6
7
8
9
10
11
12
13
14
15
Initializing provider plugins...
- Checking for available provider plugins on https://releases.hashicorp.com...
- Downloading plugin for provider "external" (1.0.0)...

The following providers do not have any version constraints in configuration,
so the latest version was installed.

To prevent automatic upgrades to new major versions that may contain breaking
changes, it is recommended to add version = "..." constraints to the
corresponding provider blocks in configuration, with the constraint strings
suggested below.

* provider.external: version = "~> 1.0"

Terraform has been successfully initialized!

运行配置文件

运行terraform apply使用配置文件:

1
$ terraform apply

可以得到一下结果:

1
2
3
4
5
6
7
8
9
10
data.external.example: Refreshing state...

Apply complete! Resources: 0 added, 0 changed, 0 destroyed.

Outputs:

result = {
  abc = 123abc
  id = abc123
}

我们可以看出terraform调用了python脚本,并把返回值放在模块命名的结构中:data.external.example.result。我们也可以在python脚本中加入错误处理(第二个版本)。可以加入log处理,以及其他一些可以aspect oriented(不影响主流程的功能块)的逻辑。

至此,我们完成了对Terraform的external data source作为配置结构的神奇之处的说明。你可以在这里看到本文的源代码:https://github.com/lifuzu/terraform ,或者“点击此链接”给出你的意见和好的建议,谢谢

参考文章或者链接:

以下是一些扩展阅读。

HCL与UCL关系:

翻译自https://github.com/hashicorp/hcl/issues/154

(HCL)与UCL的兼容性肯定不是目标。尽管从一些通用语法风格中获取灵感,HCL的设计已经独立发展。可能最好将这两者视为表面相似,而不是更进一步的类同。

这里有一些非常详尽的列表,列出了我能想到的一些差异,只关注最终用户(不是Go API)的观点差异:

  • UCL被定义为JSON的超集,而HCL分别处理本地语法和JSON语法:两者没有混淆。
  • HCL本地语法使用换行符分隔项目,而UCL需要逗号或分号。
  • HCL没有自动数字乘数后缀,尽管早期的文档声称它确实如此。 (这是Terraform直接使用UCL时继承的)
  • HCL没有内置的宏或包含支持;如果需要,这是必须在应用层处理的东西。

在撰写本文时,HCL(很快将被追溯称为“HCL版本1”)不具有对变量或表达式的本机支持,如果需要,要求应用程序单独实现。这将在即将发布的版本2中发生变化其中受先前单独的[HIL](> https://github.com/hashicorp/hil%EF%BC%89 启发的表达式语法将包含在HCL中。一旦发布,HCL表达式将成为UCL变量的超集。

正如我所说,可能更好的是将这些视为表面上相似的两种语言,但已经发展出一些不同的决策和目标。

— Martin Atkins

Instore Pick-up Maps

floor plan map

Instore pick-up maps

Thoughts about a mobile application that provides a guide for customers to pick-up goods they wanted inside a supermarket.

With providing some goods’ name to the application that a customer want to buy, the application should provide an optimized route for the user to guide him/her to pick up the goods easily, without traffic jam around crowd, which always happens in some popular supermarkets, like Costco.

User Generated Content Backend Design

User Generated Content Backend Design

enter image description here

Most of time, web browser or mobile platform user only care how to get information from web or apps, they send GET on http protocol much more than POST/PUT. However, as one of our application required, we have to handle the requests which user submit contents to backend server.

We design the process in asynchronized way. User submit contents, once the 1st tier server (as the figure below) – mainly act as a database with a REST Interface – receive and save the contents, the server send back a response immediately to user, which indicates that user submit successfully.

Continuous Integration/Delivery Pipeline

enter image description here

Based on several software release engineering system, such as: Jenkins (include a bunch of Plugins), Gerrit, Git, Mocha, Nodejs and etc, we create a continuous integration pipeline to control source code, validation change(s), build artifact, report test results and deploy the artifacts to various deployment servers, just as: dev, staging, production (all groups). Here is a draft diagram we are trying to implement for Content Stream Application Service:

Feeding Build Logs Into Elasticsearch With Logstash on Jenkins

enter image description here

Elasticsearch platform is designed to take data from any source and as a build guy, we create a lot of metadata every day, across Android, iOS, Windows platform, such as compiler warnings, errors, lint message, unit test reports, etc. Is it possible to collect such data, then store into Elasticsearch with Logstash plugins, then visualize them with Kibana?

In this article, we setup an Elasticsearch instance very quickly, with the support of elastic cloud, then config the Logstash plugin on Jenkins to feed log data into Elasticsearch space, then display the message with Kibana.

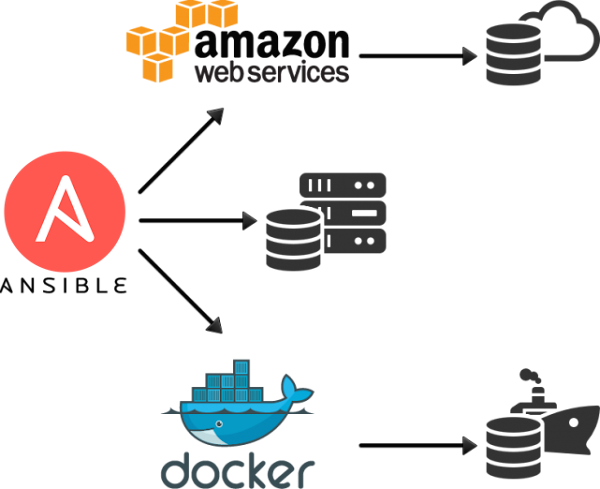
Playing With Ansible to Manage Build Pool

Ansible

Ansible is one of the best configuration management system, together with Puppet, Chef, and etc. Ansible makes IT deployment automatic and easy. With Ansible, deploying application, managing systems is becoming easier than ever, as well as building a strong foundation for DevOps.

This article use Ansible to config and manage Xcode build pool step by step.

Install Libxmljs Failed on Macosx

Today I am trying to install osmosis on macosx

1
npm i --save osmosis

libxmljs is one of the dependency of it, which is failed during installing, here is the error log:

1
2
3
4
5
6
7
8
9
10
...
3 warnings generated.
  CC(target) Release/obj.target/libxml/vendor/libxml/xpointer.o
  LIBTOOL-STATIC Release/xml.a
libtool: unrecognized option `-static'
libtool: Try `libtool --help' for more information.
make: *** [Release/xml.a] Error 1
gyp ERR! build error 
gyp ERR! stack Error: `make` failed with exit code: 2
...

RESTful WordPress

enter image description here This article introduce how to launch and config WordPress at first time, based on the composed WordPress docker container. With the several WordPress plugins, setup the RESTful API and config their permissions to register users, create new posts etc.
Playing With iOS Background Multitasking

enter image description here

In the realm of the background multitasking, Apple has made some significant changes by exposing additional APIs since iOS7.​ iOS7 introduced some new background task handlings that help developers achieve some great user experiences, just like schedule the content update some spefice times, or allow the app to launch immediately whenever you send it a special push notification. They are called ‘background app fetch’ and ‘remote notifications’ correspondingly.